Editing Your Model
Learn how to adjust your model's size, position, and materials for accurate visualization.
Glossi Studio allows you to make specific adjustments to your imported 3D models, focusing on two key areas: size/position calibration and material editing. While Glossi doesn't provide geometry editing functionality (you can't modify the actual mesh or structure of your model), it offers powerful tools to perfect how your model appears and is presented.
These focused adjustment capabilities are designed to complement your existing 3D workflow - you create and edit geometry in your preferred 3D software, then fine-tune presentation aspects in Glossi.
Editing Size & Position
Glossi automatically attempts to set your model to the correct scale when first imported, but this sometimes needs adjustment.
Calibration solves three common issues:
Incorrect size (models appearing too large or small)
Off-center positioning (model not properly centered)
Improper orientation (model facing the wrong direction

Access calibration controls:
Select your model in Studio
Find "Model" in the right sidebar
Click "Size and position"
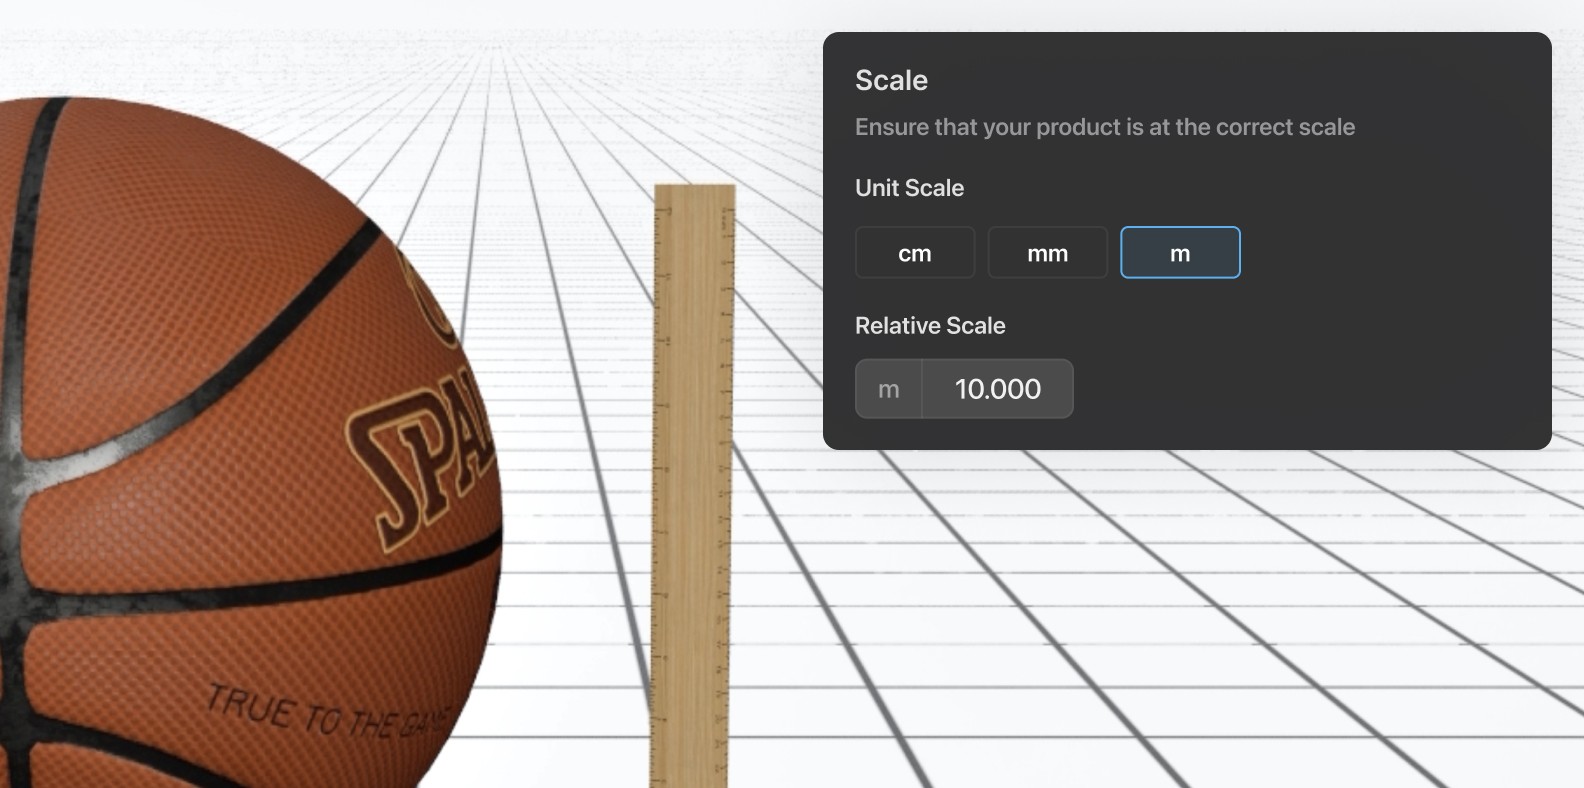
Adjust using size using scale controls:
Unit Scale changes how Glossi interprets the model's dimensions:
Select from mm, cm, or m depending on your model's setup - this is best for major size adjustments
Example: If a basketball appears too small in your scene (perhaps the size of a quarter), first try changing the Unit Scale to meters. If it's still too small, adjust the Relative Scale - setting it to "10.0" might be appropriate. You can then fine-tune as needed.
Relative Scale provides precise control - perfect for dialing in the exact size.
Enter specific numerical values (larger = bigger, smaller = smaller)
Use the arrows for fine incremental adjustments.
Position and rotate as needed:
Use X, Y, Z position controls to place your model correctly
Use rotation controls to properly orient your product (quick rotatation will help you make easy fixes)
Working with Materials
Glossi gives you control over your product's appearance through its materials system. You can adjust existing materials or apply new ones directly in the studio.
Adjusting Existing Materials
For models that already have materials applied:
Select the material you want to edit by selecting model in the left side bar and selecting a material slot
Open the Materials panel in the right sidebar
Modify properties using the intuitive controls:
Adjust color and tint
Control surface finish roughness and specularity
Fine-tune metallic properties
Modify texture intensity and UV coordinates
This is perfect for when your model has the right materials, but they need refinement to match your product exactly. Often material may have to be adjusted depending on your light setup to ensure accuracy.
Material adjustments can significantly change how your product appears under different lighting conditions. Small changes to roughness or metallic properties can transform a material from appearing plastic-like to convincingly metallic, or from glossy to matte.
Applying New Materials
For models without materials or when you want to completely change the appearance:
Select the material slot that needs materials
Browse the Material Library in the bottom of the materials panel (organized by categories like woods, metals, fabrics)
Click to apply your selected material
Customize as needed using the property controls
This transforms generic models into realistic products with 8K materials, provided by our friends at Greyscale Gorilla.
The material library provides access to hundreds of ready-to-use materials without requiring you to create them from scratch. This helps you work more efficiently while achieving accurate results
Last updated
Was this helpful?